Category Archives: Gardening

Favorite Full Sun Roofdeck Plants

These plants are tried and true for full sun roofdeck.  They do require water!  Based on 10 years gardening on my South End, Boston roofdeck.

Perennials (come back every year)

  • Blueberries – great berries and fall color, underplant with alyssum and lantana
  • Shrub roses – white seafoam and pink fairy.
  • Scabiosa – purple round, spiky flowers
  • Coreopsis – many varieties – prolific bloomer all summer
  • Heliopsis Lorraine Sunshine – underplant with annuals blue Felicitas and lobelia
  • Coneflower/Echinacea – white, pink
  • Rudbeckia – many varieties
  • Indian Blanket Flower “Gaillardia artista” summers kiss – with lavender
  • Daisies- many perennial varieties
  • Walker’s Low – Nepata Faassenii…beautiful grey/green leaves with continuous flowering blue spikes. Cut back if flowering stops
  • Susanna Mitchell – Anthemis Hybrid…delicate foliage with daisy flowers that close at night
  • Lavender Provence, Hidcote (sometimes these just die over winter – not super hardy)
  • All sedums – many, many varieties
  • Daylillies Stella d’Oro daylilies (yellow), planted with lavender, lamium, and purple/white violas
  • Nicotiana – several varieties/varying heights – white flowers

Annual Vines

  • Mandevillas – these come in climbing vines (pink, white or red) or red bush varieties. Super bloomer
  • “Candy corn” vine available from Hillbilly Acres nurseries…underplant with yellow lantana and alyssum
  • Thunbergia (yellow flower) …underplant with alyssum, brachyscon, zinnias
  • Morning Glories – I plant them everywhere – bloom in morning late summer and fall. Best bloomer by far is variety “Heavenly Blue”.  Can be invasive at ground level.
  • Passion Flowers – totally beautiful flower, climbing vines in a variety of colors

Annuals  (Must buy every year)

  • Arctotis Graadis – beautiful white flowers with silver leaves
  • Verbena
  • Hibiscus – these can be trimmed to be like trees or are in bush form. Continuous bloomer.  Tropical – bring indoors in winter…condition slowly to put outside again
  • Zinnias – Always a winner all summer
  • Double impatients – I am not a big fan of normal impatients but the double ones are fantastic, vibrant colors – a standard for me. Do better with partial shade but recover well after they are wilted.
  • Bacopa – can be good bloomer all summer but may die off in heat spell/needs water
  • Gaura Whirling Butterflies..G. Lindheimeri – Another standard planted with Euphorbia diamond frost
  • Lantana –One of the best heat tolerant plants, variety of colors
  • Allysum – totally heat tolerant and small white blooms all summer, low 2”
  • Brachycon (Asteracea Brachyscome, lemon twist swan river daisy) – fine leaves and small yellow flowers, great for overflowing containers
  • Double petunias – wave variety – these are the only plants that have survived in 5” deep hanging boxes
  • Coleus – plant a mix of them in a container, don’t mix with other plants as they’ll take over
  • Spearmint – great for mojitos
  • Sunvitalia – very heat sensitive, cannot dry out
  • Osteospermum – white with purple centers is my favorite
  • Argyanthemum – prefer cooler weather so may die in hot spell
  • Felicita – small blue flower (Felicia amelloides) good for underplanting

Hellebores…Beauty among the Debris

Hellebores are one of the earliest flowering perennials.  Note that these plants are often sold in grocery stores in early spring and people think they should just throw them out but NO!  Plant them for next year.  Many a good perennial is sold and accidentally thrown out if the owner doesn’t realize the treasure they have!  Another great example is in Sept/Oct timeframe you’ll find Montauk Daisies sold as little gift plants.  These things are workhorses and need to be planted for one of the few flowering fall shrubs.

Anyway….hellebores look a little mangey.  Some of the old leaves are brown and flattened on the ground but look closely as the little flowers will start to show themselves in March.  They’ll add leaves and perk up through April.  They come in a lot of different colors and are slow growing – mine has taken a few years for my first to become a bit intimidating.   They also need just the right spot and can be finicky.  Mine seem to like a spot under a tree that does get some direct sun.  I had a few in a more shady area and they did not do well.  I have started a little hellebore garden now outside my office window.  Note that if they are in the right spot, you can abuse them and they still do well.

What to grow with?  I often interplant them with tulips and they are growing with a huge hosta and some Jack Frost Brunnera underneath a magnolia.  It is a bright spot in my yard in early spring!


Get to Work its April 19!! Spring Cleaning

And with all of us working at home due to the Corona Virus, a little more time to work in the yard!  I can’t complain as this is my “office” view of the magnolia and a few hellebores on my desk.

This is what you need to be doing so you can spend May buying plants!!  And note that some good perennials start going for sale in April, which are totally safe to plant as long as they’ve been outside.

  • Thorough leaf cleaning of the yard.  We rake onto tarps and drag into the woods, use a high powered leaf blower and also a lawnmower to pick them out of the grass.  If you get most of them up, you can use mulch to cover some in your flower beds.  Leaves will just compost and mulching right after makes everything look neater.  Here are a few before and after shots from the last three weeks:
  • As you do the leaf cleaning, cut down all the perennials left over from last year.  Cut off the old daylilly brown leaves all over the ground, rip off the old sedum stalks, hosta stalks, tall phlox, cut down all the old peony stalks (but be wary of the new shoots!), cut down the grasses and get those leaves out of the base of your shrubberies!  No easy way to do that.  Just dive in and get them out by hand.  I use a very small plastic rake to try my best before hand picking them out.
  • Take a break and have fun.  Order a few more bulbs!  I just ordered 20 (more) dahlias, some calla lillies and a bunch of caladiums.  All of which need digging up for the winter.  I may have accidentally killed all my old dahlias leaving them dug up in the garage too long causing them to mold.  I have little hope.
  • If you’re making a mess while cleaning up leaves with all the perennial rubbish, you might as well do some pruning as well of your hydrangeas, spireas, Montauk daisies, and any boxwood hedges you have.  This boxwood hedge is AFTER pruning. I like to keep them natural looking and dive right in to cut out some of the big branches just trimming a little at the end.  Getting light in there will keep it healthy all the way thru the shrub.  That debris took up a lawn bag or two all on its own!  I think I also made about 10 trips dragging branches out to the trailer between what I pruned and just branches that had come down due to winter storms.

IMG_8610

  • Before laying down mulch, edge and get the grass out of the beds!  This is very important.  You need a 2″ clean vertical cut for grass not to grow into the bed.  I have some rubber bed edging that always needs cleaning out as the mulch/dirt eventually covers them and they don’t prevent grass that well so I always have some work to do.  Pretty fast work though and nothing is better than a good looking edge to your beds!
  • Trim your crabapples if you need to.  Tall husbands useful here.  Remember your rose gloves as doing battle with crabapples is not for the faint of heart!
  • Spread down some grass seed for all the bare spots.  Our front yard always looks ragged from the critters and from me dragging big branches through it…

IMG_8586

  • Clean and reactivate any birdbaths and ponds.  Get those dead frogs and snakes out of there!
  • Take a half day and go out to a local nursery and buy a few of the always good, cheap perennials you can never have enough of prior to mulching.  I just brought home a few more columbines (my husband calls them chlamydias but that is a sexual disease…), hollyhocks, some spring flowering low growing clumps of something I can’t remember now, and pansies for the front window box.
  • Rake those leaves gently off all the daffodils coming up!  Their yellow leaves will turn green in time.
  • Take a few hours and have fun pulling out all your pots and setting them up.  Important to get the dirt wet again as it has dried out all winter.  I pour water in and am very careful before planting. Leaving them out a few weeks before you try to plant helps a lot.  You’ll also have to freshen up the dirt in them anyway with a little compost/manure.  Don’t forget to put them on feet so they can drain.
  • Get out the hoses!  I have converted to the very lightweight, expandable hoses so those are simple.  We need the old, long rubber ones to drain the pond.  Nothing is worse than rolling up a hose.  That is my husbands’ job.
  • Also important is to address the varmit holes… as soon as the leaves are up, spread down some mole away typically made up of castor oil to make them go away (or at least into your neighbors yard!!).  The hole below belongs to a very cute groundhog who eats all my plants.  I don’t want to kill the guy and am in a quandry right now with what to do about him.  One year I did try to bomb his hole but ended up poisoning and killing a crabapple tree instead.  Every afternoon I see him taking a stroll through my garden.  For the little voles/moles, you can use some chlorine pellets if you cover up the hole after.

IMG_8587

  • And very importantly, PULL UP ALL WEEDS BEFORE MULCHING!  You are wasting your time mulching if you do not do this.  Avoiding weeds and stopping them from coming back is the entire point of mulching.  Don’t be lazy and cause yourself extra work a few weeks later when your newly mulched beds end of being the perfect backdrop for a bunch of weeds!
  • Only now should you mulch.
  • If you mulch NOW, in April, you will do a preemptive strike on weeds and save yourself a ton of work.  There are just a few short weeks to do this before all hell will break loose.  I start with 10 cubic yards.  For beds with few weeds that still have mulch left, I may just do a sprinkling of it.  For weedy areas, I put down a good 2-3″.  To calculate how much you need in cubic yards, do this math:

Approximate square feet you need, for example 100 s.f..  Multiple by 3″ converted to feet to get cubic feet and divide by 27 to convert to cubic yards.  There may be free delivery if you order some amount so ask about that.  They like to deliver on a tarp.  make sure to weight down the edges as it will blow away.  I put bricks, logs or pieces of slate around it and once it is down, keep it covered with a tarp so it doesn’t get soggy and blow away.

Example:  (100 feet*(3 in)/(12 in/ft))/27 = cubic yards

IMG_8539

  • Sweep after you have cleaned up the leaves and put down mulch.  Nothing is worse than dirt all over your patio and paths and driveways.
  • Make sure that when you cleaned up, you exposed the true edges of your patios.  Often grass can grow over the edges slowly shrinking down your playspace.  Show it who’s boss and scrape it off with a trowel!
  • Put out your patio table awning.  Ours still has a hole in it from last year when my husband killed a wasp with a blow torch under the awning and caught it on fire…
  • Set out the tiki torches!
  • Take a break the few days you might get a snow if living in NH!  This was last week …typically melts within a few hours.  This is the reason that you have to wait to plant annuals.  I had already purchased a few pansies so made sure to cover them with a plastic bag for snow and freezing nights and they are still doing fine.

IMG_8521

A note on child labor:

It it wonderful.

The last few years I have been hiring neighborhood kids to help bring me wheelbarrows of mulch while I lay it down which is awesome!  I also have them do the edging and often, dig me new beds as mine are always expanding a little…. Delete and repost your advertisement in facebook if some local mother writes that you aren’t paying her kid enough.  Minimum wage for someone not old enough to work is apparently not enough in my neighborhood…..why try and thwart me?!

This year of the corona virus, it was up to me and my strong husband to do it all.  While working at home, we’ve been power mulching for 30″ a night during the week.

What not to do:

  • Cut down any lavender.  It looks like crap right now – that is normal.  Leave it alone.

IMG_8597

  • Dump mulch over little plants coming up.  In beds with a lot of plants, I use a wide toothed, heavy rake to gently shake the mulch over top of them or manually lay it down.  Covering up most things with a little bit of mulch won’t hurt but i wouldn’t bury tender leaves of a little lungwort or columbines or tulips.
  • Do not mulch around the base of trees – that will kill them.  Leave the tops of the roots or the flare at the bottom free.  Any landscape company that does this is a bunch of hacks.

Do not work so hard it is not fun.  I’m giving you a little crap and trying to scare you to mulch early – which is important – but enjoy your time out there.  Talk to your neighbors.  Commiserate about the groundhog.  Divide a few daylillies and share.  Sit down and enjoy being outside with the sun on your face. Tell your hard working husband how great is doing (positive reinforcement!) and don’t forget to stop for a 5pm “zoom” cocktail with your friends (corona times…).

Garden on my friends!


For the Love of Dahlias…

I guess the 20+ I have in my basement aren’t enough because I just ordered 20 more bulbs for this year 🙂

They are taking up a considerable dedicated space these days around a crabapple tree and have also expanded to be along the periphery of another sun bed.  It took me a few weekends to dig up all the pachysandra to create this space.  A secret to getting rid of pachysandra is to post and have others dig it up.  Garden centers charge dollars for one stem when they can lift mine in huge sheets for free!  Everyone is happy.

I surround them with other things so the space looks natural – here is a picture when they are just about a foot high- they are hard to see in front of all the daylillies.  After seeing a beautiful massive grouping of daylillies when walking Lake Superior in Duluth, MN, I realized how beautiful it is if you can group them.  This tells you how late in the summer they are ready – the phlox is tall in this picture and the daylillies are already blooming too.

IMG_5615

Is it time to plant? (courtesy of Swan Island Dahlias)

  1. Is my ground temperature around 60 degrees?
  2. Is it time to put the vegetables in my garden?
  3. Is the weather warm and dry enough to allow me to work in my yard on a daily basis?
  4. Is my soil workable, not too soggy?
If you can answer yes to those questions, then your dahlias are ready to be planted. It is important to remember that dahlias DON’T like cold and/or wet feet. So, if you get one beautiful day and the rest are wet and cold, don’t plant. Dahlias for the Northern half of the United States can be planted anytime from late April through early June.
Storage
I take them out of basement where where haphazardly thrown in late fall in paper cartons, milk crates, old cat litter boxes and the plastic garden trays some garden centers put plants in:
dahlia storage

I haven’t split mine very much yet because they have been growing a few years getting bigger but note that each “tuber” is not a plant.  They need to have an “eye”, which are hard to find.  My strategy will be to just hack one in two when I am ready.  Any plant that requires too much delicate handling is just not for me!

I throw them in the ground around mid/late April with a small stake to note where they are and put them about a foot apart.  Is it worth trying to plant them earlier in pots?  NO.  I tried it vs. just putting them in the ground and didn’t see a huge difference and it was a lot more work.  Just throw them in the ground – don’t water them in!  Throw some slug bait down and give them a few weeks to come up.  Once you start seeing a few sets of leaves, pinch them back – even if they have a bud on them!  This will give you a bushier plant.

Staking

They take your breath away.  They require patience as once planted, you won’t see a flower for a few months.  But when they flower, wow!!!  And then you realize you need to stake because they grow so fast.  Last year, I started/made little cages out of garden fencing and used those in place of staking which was less work.  I need another year of this to decide the right mix.  You can see below a cage vs. my typical staking on the right.  Note that one plant needs several stakes because some get so big and wide….Stakes become a huge mess and some plants needed 4-5.

Although the caging method looks funny for a while, they soon disappear as you can see below and contain some pretty big plants.

IMG_5608

I’m growing into getting bigger ones every year… here are a few of my new ones

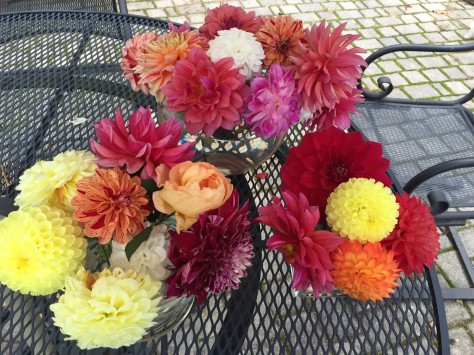
The dahlia is also a mystery….who knows what you will find in one!  Spiders, FROGS!….. I cut mine and leave them outside for a few hours so the creatures inhabiting them may leave.  These are a few I cut so my husband could take them and give them to all his work wives.  He walks proudly into his office with several bouquets in hand taking care of those who take care of him.

dahlia bouquet
Here is my favorite (“Fluffles”) of all the ones I grew last year:
IMG_6437
Unfortunately, it didn’t grow that big or give me many so let’s hope it does better/is bigger this year!
When to cut
You MUST wait 2 weeks after a hard frost before digging them up.  You will read it is OK sooner but I lost all of mine one year by being “proactive.”  A hard frost will immediately turn all the leaves black.  Then wait…wait….and cut off the top stalks, dig them out and take off what dirt you can.  I let them dry NO LONGER THAN A WEEK in the garage before shaking off even more dirt and putting them downstairs.  If you leave them too long, they will start getting moldy.
They really do require full sun and I keep expanding one of my beds to give them the best conditions.  Here is “Cafe au Lait” which is a big one, loving the sun spot I moved it to this year.
IMG_6019
Pots vs. In Ground
One year I tried planting a bunch in pots and it didn’t go so well.  I am throwing them in the ground from now on reserving a pot only for a short, bushier variety like: Bishop of Llandaff:
bishop of llandaff dark leaf dahlia
So here’s to an ever expanding dahlia collection and to all the mornings I walk out in my pajamas getting my feet wet to cut some and make someone smile at work!
dahlia quoe

Container Gardening Class

Container Gardening 2019

Normally I do a container gardening class at the local library, which is, of course, not possible this year with the Corona Virus so I am posting my presentation here.  I also have this handout which also has a few of my favorite perennials (plants that live outside year after year) and good books and other resources:

Plant List Handout for Container Class

The cover picture is from my old roof deck and this is a passion flower, which is an annual out here in the northeast.


Fall Favorites

fall


When I had a roofdeck, I would plant morning glories in every container and by the end of the summer, their huge blue flowers would cover every rail (and take a few hours to cut down late fall!).  The best morning glory for quantity of blooms is Heavenly Blue.  If planted in the ground, they can become invasive so must be managed – ie. Keep your eyes peeled and pull up extras in the spring.

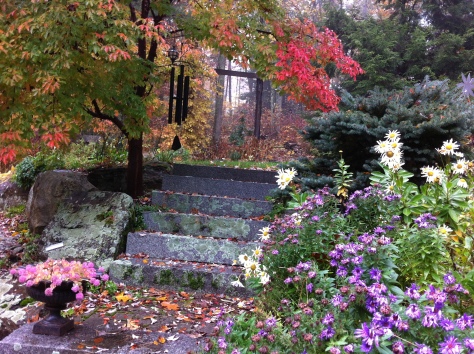
My favorite combinations for a yard include blue asters, Sedum Autumn Joy and Montauk Daisies planted together.  You might find Montauk Daisies at the local Whole Foods sold as potted plants – just throw them in the ground for a fairly large shrub for next year!  These are very hardy, very florific white daisies in the late fall when nothing else is in bloom.  Trim these down some in fall but primarily in early spring (before June).  These will also easily root if a branch is touching the soil so are easily proliferated.  Note that asters are also very easy to just shovel in half to divide.  I was so glad I had divided my favorite before it was infested and killed by AZALEA LACE BUGS.  Lesson there is to take quick action when you see anything starting to falter – inspect and deal with it.

Caution:  I would not plant a white aster, which is lovely for a few years, and then will invade your entire bed and spread around your yard.  Do not do it!

Mums are great and are perennials – I have heard if you buy the ones distributed in the fall and plant them early enough, they might come back.  I haven’t had much luck with that but have beautiful perennial ones I have ordered from catalogs and planted in the spring.  Mums will also spread so don’t hesitate to pull out strays you see coming up.  They get to be 3-4’ tall and should be staked late August.  Nothing beats a few mums bought at the local nursery to spruce up a worn bed – I will plant them in sets of 3 in my main perennial beds.

Container Planting

“Success has been defined as the ability to go from failure to failure with equal enthusiasm.”  – Unknown with some attributions to Lincoln or Churchill

The first year I did container gardening on my Boston roofdeck, I carried four 30 gallon leaf bags full of dirt down five flights of stairs in the fall. I didn’t know I could reuse “dirt” year after year by adding a little cow manure and compost to freshen the pots.  And potting/container mix is not the same as garden soil, which is much heavier and has a different composition.  My preference is for Coast of Maine products but definitely beware of Kellogg organic plus found at Lowes and Home Depot which almost killed all my plants.
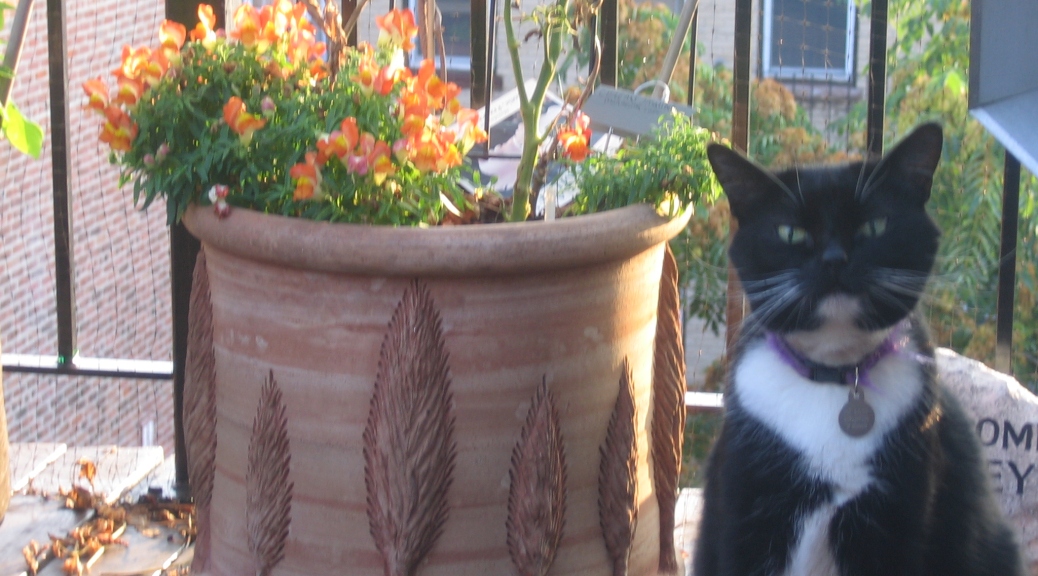
I would find a pretty flower and put short phlox, or delphinium, or bleeding hearts or bachelor buttons in a container in the spring not realizing the flowers would soon go away and then add nothing to the small space requiring plants with maximum impact.  Read the labels for flowering season, zone and if for sun or shade.

After buying some new containers, plants I knew would do well, and new soil, I planted them and almost killed them because I didn’t moisten the soil and it takes an awful lot of water to wet dry soil.  Spend a few minutes with the hose and then stick your finger in the soil to see how moist it is.  Now I water the soil as I put it in the pots to ensure it is moist all the way through.

My second year, I wanted more and more so I realized I needed to buy containers at least 14″ wide and deep.  What I hadn’t learned yet was that when you have large containers, you need larger plants and that low growing sedum would just look silly in a 20″ round pot.  My favorites for height in containers is mandevilla, salvia, dahlias, geraniums, zinnias, elephant ears or caladiums, heliopsis lorraine, lavender, daylilies, and shrub roses.

I also realized that any space needs a variation in height so I experimented with vines and found little trellises that go in the back of a container to help morning glories grow up to the top of the deck rail or mandevilla vines or thunbergia.

Note:  My goals is to start doing a series on gardening.  This is a draft of my first attempt.  Be kind.  Be patient and this will get better 🙂